Stenciled Accent Wall: Cheaper than Wallpaper
This post may contain affiliate links. If you purchase something through one of my links, I may earn a small commission at no extra cost to you. Thanks for supporting my crafting adventures! Read my site policies here.
Why I Tried This Project
Wallpaper is having a serious comeback. Pinterest is full of gorgeous bold patterns, and after freshly painting my son’s walk-in closet, I kept thinking: that wall needs something extra.
But here’s the thing—wallpaper is not cheap. Even peel-and-stick options were going to run about $500+ for just one wall. Yikes.
Stenciling crossed my mind next. Simple, geometric patterns can look amazing and add big impact. But then I saw the price tags on larger stencils (around $125 once you factor in supplies). At that point, my frugal brain kicked in: “There’s got to be a cheaper way to do this.”
Enter: my Silhouette machine. Why couldn’t I just cut my own stencil? A quick Pinterest/Google search turned up this tutorial [insert link], and that was all the inspiration I needed to give it a go.
Difficulty, Time & Cost
Difficulty: Medium (ranges from frustrating to surprisingly satisfying)
Time: About 3–4 hours (once I figured out the method)
Cost: Only $30 (vs wallpapering the wall at $500+)
Verdict: A win! Bonus: a professional painter actually thought it was wallpaper. Proud DIY moment.
The Process 🛠️
Create your stencil.
Using a Silhouette (or Cricut), cut your design into thick stencil plastic (I ordered mine from Amazon).
Pro tip: keep your pattern simple—tiny, intricate cuts are more likely to tear or warp.
Prep your wall + stencil.
Clean the wall surface.
Lightly spray the back of your stencil with tacky spray (this keeps paint from bleeding under).
Start painting.
Position stencil on the wall.
Use a small foam roller or stencil brush with minimal paint (less is more!).
Gently roll/brush over the stencil.
Repeat, repeat, repeat.
Move your stencil down or over, align carefully, and continue the pattern.
Take breaks—your sanity will thank you.
Touch up.
Fill in any little gaps or smudges with a small paintbrush.
Step back and admire your “wallpapered” wall… except it’s not wallpaper.
Supply List (with links!)
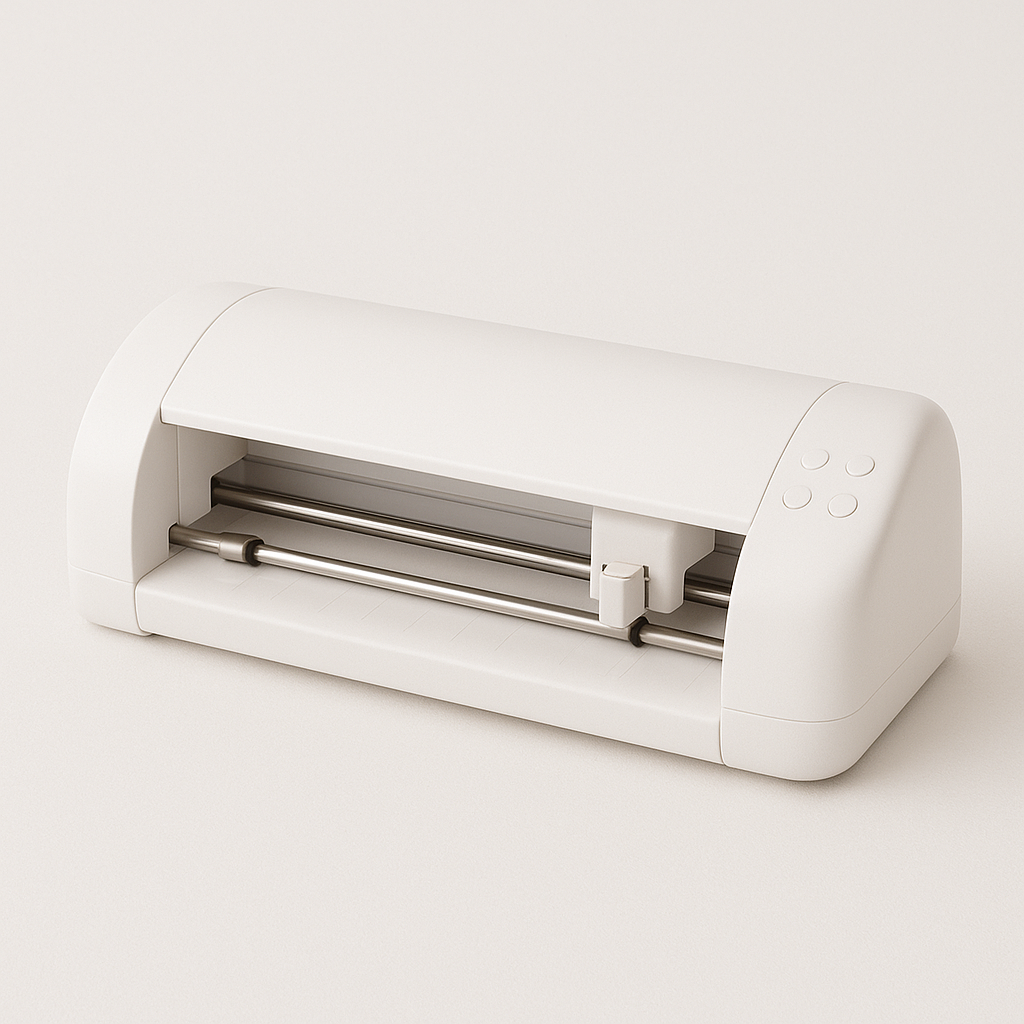


Vinyl cutting machine (Silhouette or Cricut)
Large cutting mat
Thick stencil plastic (this is the one I used)
Paint in your color choice
Finished Project ✨
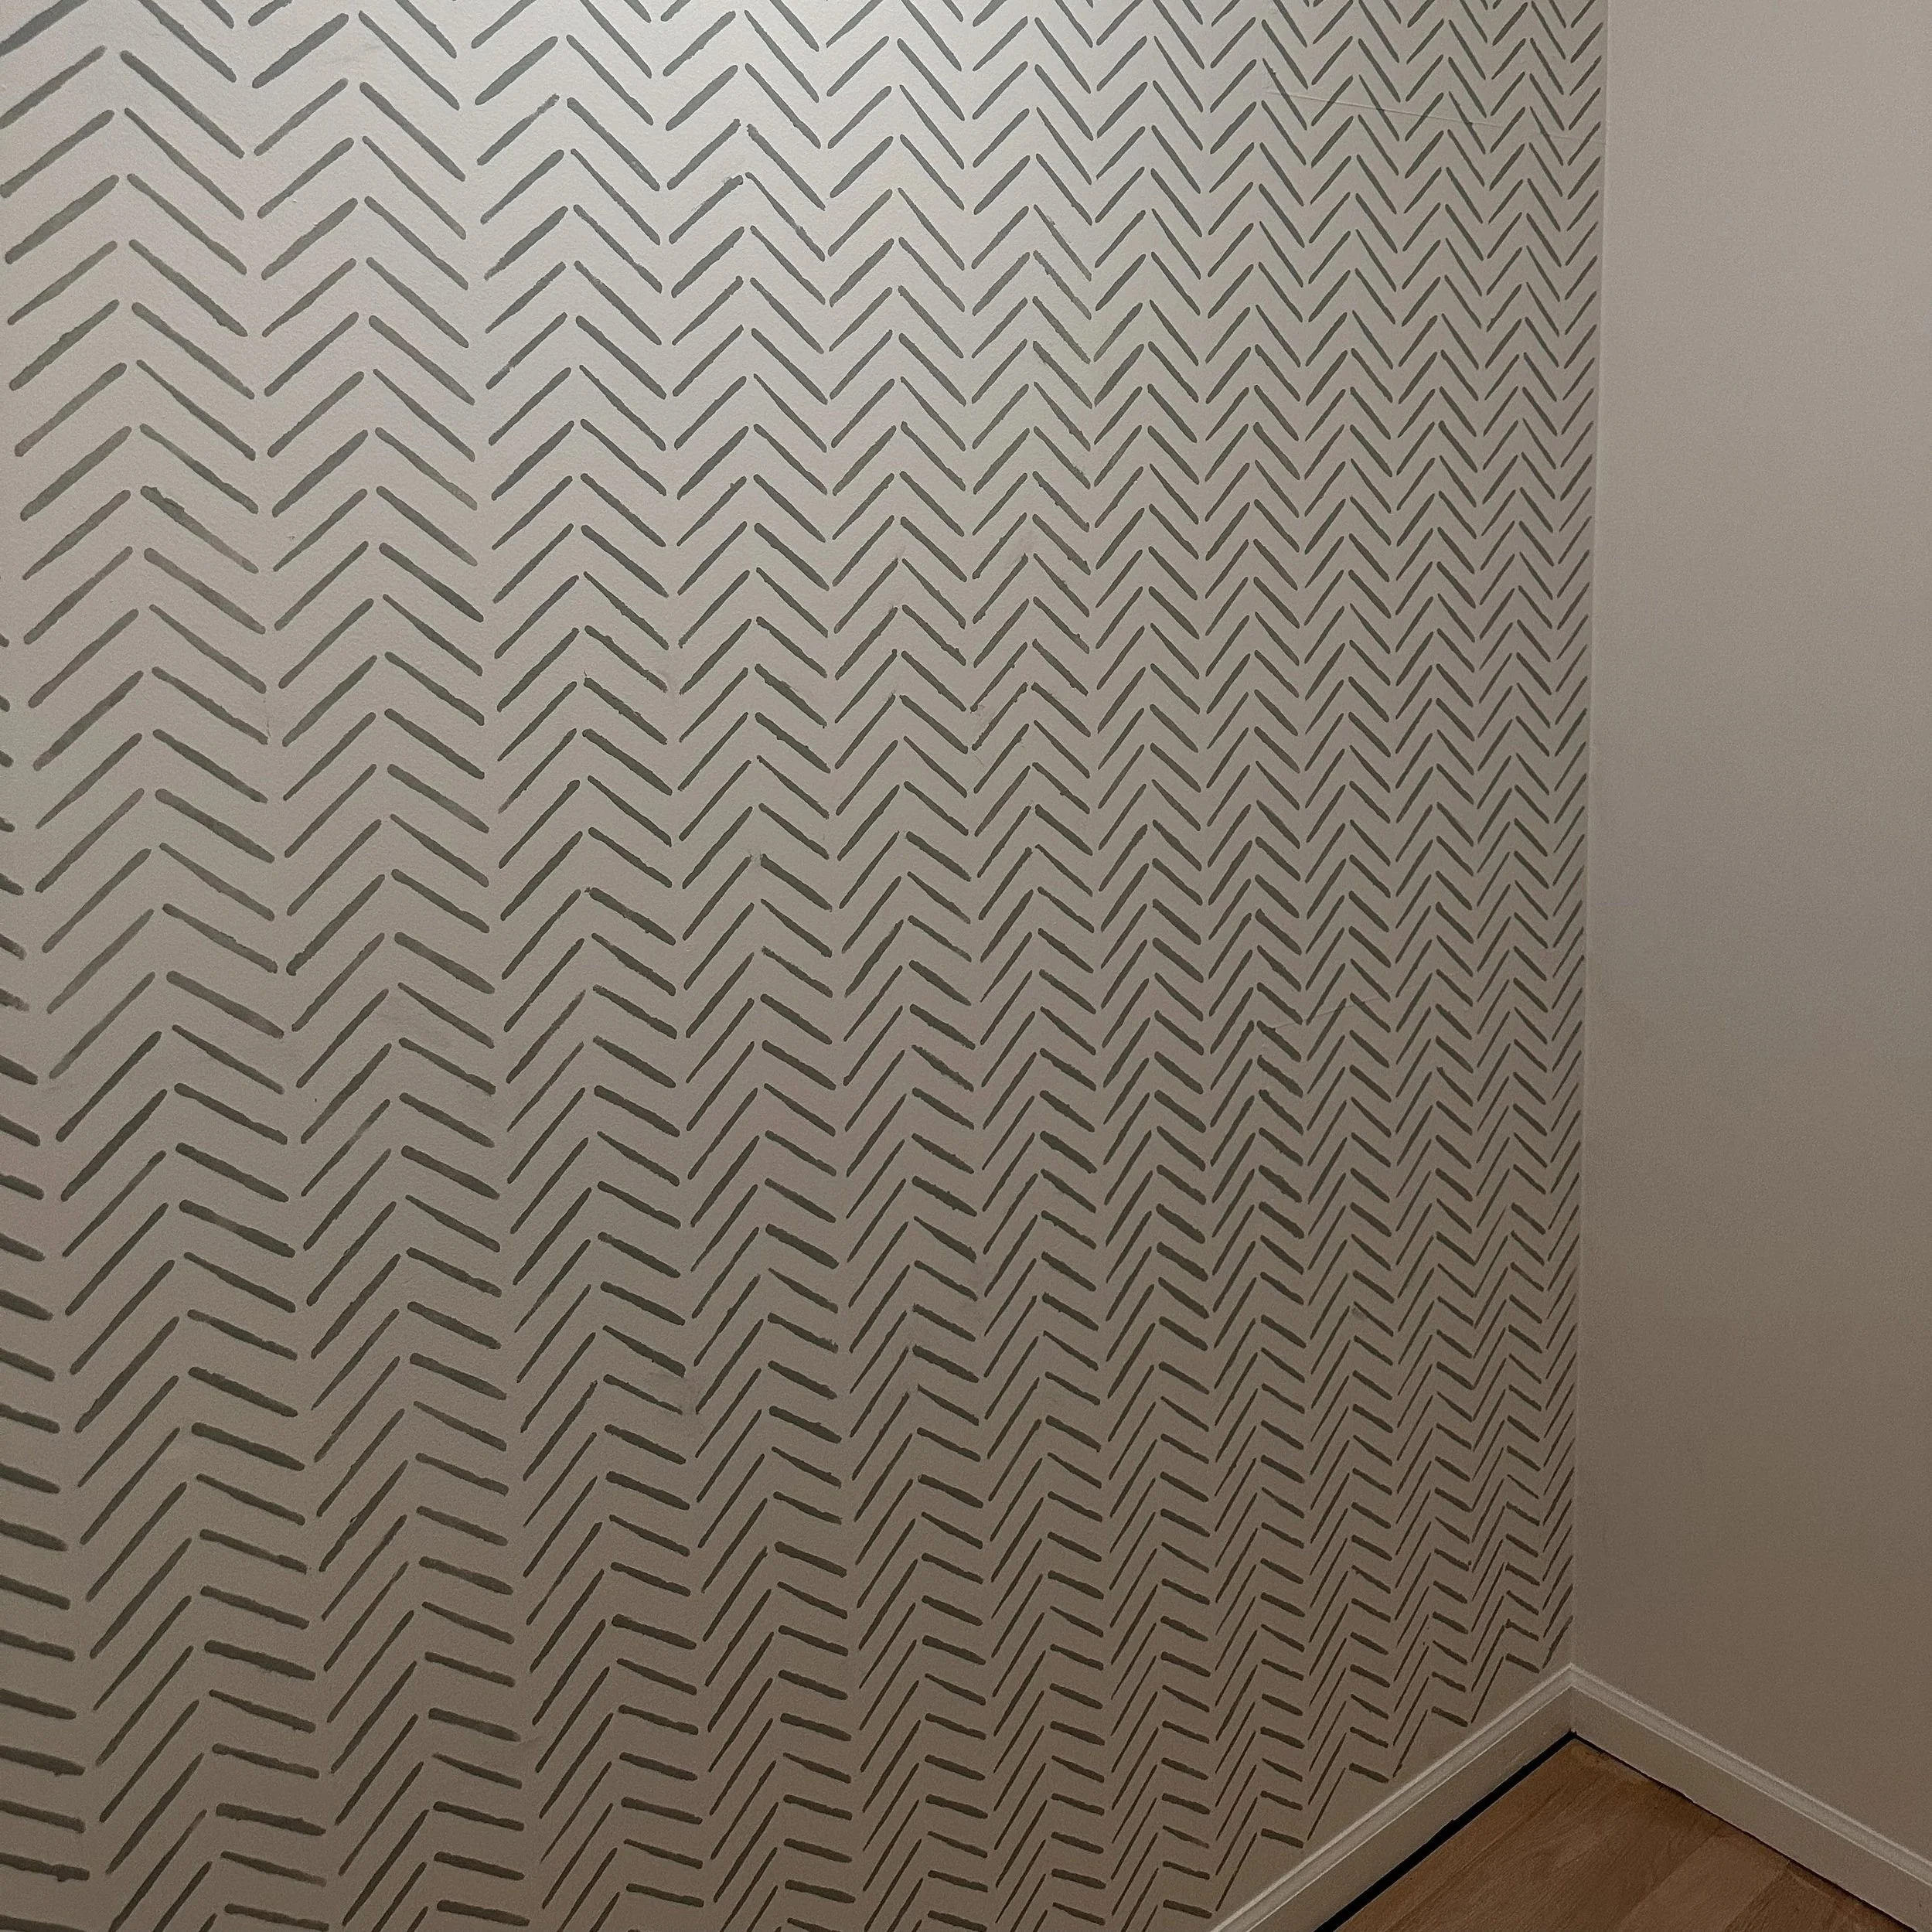
Finished stenciled wall.
The end result? My son loves it, and I love that it cost me a fraction of wallpaper. When the professional painter came by to do trim work and casually asked, “What wallpaper is that?” … let’s just say I did a little internal happy dance.
Final Thoughts
Would I wallpaper a wall someday? Absolutely. If I was splurging, I’d probably go with X, Y, Z brands (reasonable pricing + gorgeous patterns). If I went the premade stencil route, I’d pick this one [insert link].
But honestly? If you’re looking for a budget-friendly, customizable option—you can totally DIY this. And if you want to use the same stencil design I created, you can gain access to download the template for free - find it here.
👉 What do you think—are you Team Wallpaper, Team Store-Bought Stencil, or Team DIY Stencil?


